Original Intentions
The original intentions of my project was to make sure that i understood the mythical creatures and how they fit into the research of Greek mythology. I took some images of my own and compared them with the mythical creatures from Greek mythology.
The production of meaning
No i don't think that my photographs gave a good impression to other students due to the fact we didn't spend much time on taking photographs. Some people said they were okay but they also said that i can improve on them by making the light equal and getting pictures of different parts of the animal rather than just the face. My overall intention of my pictures getting a bad comment about them was likely as they weren't took professionally.
The production process
While doing this assignment there were many techniques i used to do the work for example getting grips with the camera and understanding how to use all of its features so the pictures will have better quality when i take them. The skills i learnt are how to use time structure and get really good quality photos. The difficulties i encountered are that i asked people to do a shoot with me and they didn't turn up, not having a lead to upload my pictures, battery running out, storage card is full so no more photos can be stored.
How do your photographs compare to similar
professionally produced examples
I dont really think that my work will compare to professional shots but i do think there are some good elements included into my types of shots. The similarities are that my work and a professionals work both contain animals but i have took pictures of animals you see everyday. The professional might have took pictures of rare exotic animals what i cant get a hold of.
What are the strengths and weaknesses of your photographs
With the photographs i took i realized that there are more weaknesses than strengths. On each contact sheet i created they had strengths and weaknesses in them. The weaknesses are that not all the pictures have a lot of light applied to them so its hard to see whats in the picture due to the loss of light, i didn't really get a lot of different features with my animals as they were all pictures of their face. The strengths included in my work are that the images are clear their close-up shots and they show detail of the animal.
If you were to do this project again what would you change
If i had the opportunity to do this assignment again i would manage my time more efficiently so i could get more shots of the animals and show more detail and parts of them so the viewer can get a better understanding of the animal. I would also try to get more clearer photos of the animals so i could create more contact sheets and show of my photography skills. I would also show a different approach to my work and get a wider range of different animals i could use for the assignment.
Tuesday, 29 March 2016
Thursday, 24 March 2016
HA3 Task 3


Here are the 3 final contact sheets i have chosen for my work. I chose these 3 because i thought they they were the best to look at from my work from all of the others i created. In the second one there are a few mistakes with the subject not being in focus or not focusing on one part of it. But that's when i realized i made the mistakes and i fixed them in the 3rd one i created i made sure each shot was in focus and that they all have the same amount of light hitting the subject in each image when i took them. There was also one more problem with the 3rd contact sheet. The problem is that they are all still images of the dogs faces this doesn't really show any full detail of the subject for example i could of got shots of their claws, back, legs anything what really shows of more detail and will help the consumer get a better image of what the animal is and also what purpose it shows.
Friday, 18 March 2016
HA3 Task 2

Assignment Title: Island quest concept art reference pack
Date: 26/02/2016
Location: Interior
Lighting: Heat Lamps
Camera: Nikon D3100
Manual Focus And Zoom
Aperture: F5.5
Shutter Speed: 1/60
ISO: High 2
White Balance: Preset Manual
Conclusions
Most of the pictures are not very bright but there are some at the top what are brighter than the others. Next time i do a shoot i will make sure all photos are equally lit up with the same amount of light.

Date: 15/03/2016
Location: Exterior
Lighting: Natural Lighting
Camera: Nikon D3100
Manual Focus And Zoom
Aperture: F8.5
Shutter Speed: 1/60
ISO: High 2
White Balance: Preset Manual
Conclusions
Subject wasn't really in focus so couldn't get any detailed pictures. The subject wasn't central and didn't focus my shots on a certain target. Next shoot i do i'll make the subject in focus and try get some central shots and birds eye view shots.

Assignment Title: Island quest concept art reference pack
Date: 21/03/2016
Location: Interior
Lighting: Indoor Lighting
Camera: Nikon D3100
Manual Focus And Zoom
Aperture: F5.5
Shutter Speed: 1/60
ISO: High 2
White Balance: Preset Manual
Conclusions
Here are some shots what i took of my dogs yesterday. As you can see in he top part of the pictures they are over exposed as to the pictures at the bottom which are under exposed. These pictures don't really show any features of the dog because they are all pictures of their face. Next shoot i do ill get more detail and features of the animals for example back, claws, legs neck.

Assignment Title: Island quest concept art reference pack
Date: 23/03/2016
Location: Interior
Lighting: Indoor Lighting
Camera: Nikon D3100
Manual Focus And Zoom
Aperture: F4.5
Shutter Speed: 1/60
ISO: High 2
White Balance: Preset Manual
Conclusions
Here are more shots of my dog what i took yesterday as you can see not all of the shots have a lot of light in them so you cant really see the subject in the picture. I tried to get different parts of the dog so i could mix it up a bit and so that other people will see it to.
Monday, 14 March 2016


Friday, 4 March 2016
HA2 Task 2
Location


Night


For this task we used a camera with a tripod and had a really fast shutter speed which means when we walked past the camera took multiple shots or our movement sequence. The scene was also heavily lit with 2 lamps directly aimed at the green screen in the background.
Portrait

Here is a contact sheet portrait of me it shows different facial expressions. The pictures shown above are all grainy looking this is because they were taken in a dark room with not much light source applied to the image. Because they are all grainy the quality inst really that good so its not really appealing for people to look at.
Event


Here are some pictures what i took at the front of the college building. Our task was to choose a location of college and take multiple shots of a desired place. Once we took our pictures we had to create an animation in flash and put all the pictures together so it runs smoothly once you play it back.
Studio


For this task we was in a studio taking pictures with different color light types filtering in the background to see which light was the best. We had a camera setup on a tripod for balance control and the lights in the background. The objective of this task was to see which light worked the best as you can tell in both my images i think the first one was better because it emitted orange light making it look warm compared to the second what makes it look cold.


Taking pictures at night can be a difficult task due to the fact that there is no light. So to capture a good photo means you have to alter your shutter speed which is slowing down the cameras time of catching a photo it also means that the picture will be blurry but that's good because it means that light will be applied to the image as demonstrated in both pictures above. The light is also a trail rather than being in one spot.
Moving


Portrait

Here is a contact sheet portrait of me it shows different facial expressions. The pictures shown above are all grainy looking this is because they were taken in a dark room with not much light source applied to the image. Because they are all grainy the quality inst really that good so its not really appealing for people to look at.
Event

Here is a picture of an event remake. At an event there will be people having group chats about a speech. I tried to re create an event scene myself by gathering people in the corner. An event is something important what happens to you, for example attending a wedding, or birthday party.
Friday, 5 February 2016
HA2 Task 1
Angle


As you can see in the pictures above i have used my photography skills to try and show you what angle is. Angle shots can be took in a landscape or portrait view. Angle just means how your taking a picture on any type of angle for example i have made the person move their head left and right to get a better visual experience of their face.
Level


When taking pictures there is only a small chance you will want to zoom in because it makes the picture look distorted and blurry most of the time. The zoom function is located on the back part of the lens at the front this allows you to reach great zoom as you can see the difference in the 1st picture compared to the 3rd.
File Formatting


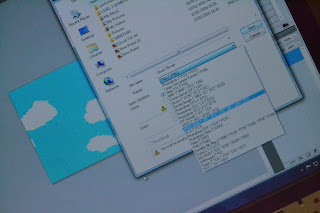
File formatting is basically a process what implies once having saved your work. As displayed in the picture it shows you the process of changing the format of your work. For example if you have completed work on photo-shop you have the option at the saving screen to change its format into a JPEG image file.
Storage


File Transfer


File transfer is an easy way to transfer your saved files on to your desktop for easy access and use. If you want to put saved files on your desktop just go in your documents hold the file and move it on the desktop they let go and it will be stored on the desktop for easy access. You can also do this with website links so they appear when you load up your device which saves time loading up the website.
Composition


When we made this we had to crop down the final product at the end to trim of the bits we didn't need. I edited the picture in Photoshop and over lapped the pictures to make it animated as the final product. In the second picture below you can see the progress of my walking cycle. I chose the middle pictures of me and used them for the animation part. Also during this process i took into the account of the rule of thirds method this means splitting the image in lines and having individual squares in the picture
Framing


Level

When taking pictures there is always one thing that you need to remember. For example this is level what is included in every picture because before taking the photo you will have to consider what height you will want to use to get the best outcome. There are a wide range of levels what professionals use such as worms eye view, birds eye view what i have demonstrated in both of my pictures.
Focus


Just like level's photographers also like to think about focus in every professional shot they take for a special occasion. As you can see i have tried to demonstrate it myself using the foreground, middle ground and background. If you look closely at the photos i took a blury photo and one what is visually better this was to show of focus.
Zoom


File Formatting


File formatting is basically a process what implies once having saved your work. As displayed in the picture it shows you the process of changing the format of your work. For example if you have completed work on photo-shop you have the option at the saving screen to change its format into a JPEG image file.
Storage


I used a pen drive to save all of my work in case all my work gets corrupted on the computer. Using pen drives for saving your work is vital this is because if the servers go down then all that data will be erased. There are other types of storage's what can be really helpful to use if you don't have a flash or pen drive. I took plenty of shots to demonstrate how you insert your pen drive into the computer.
File Transfer


Composition


When we made this we had to crop down the final product at the end to trim of the bits we didn't need. I edited the picture in Photoshop and over lapped the pictures to make it animated as the final product. In the second picture below you can see the progress of my walking cycle. I chose the middle pictures of me and used them for the animation part. Also during this process i took into the account of the rule of thirds method this means splitting the image in lines and having individual squares in the picture
Framing


For this process i shot 3 different pictures one in the middle, left and right i did this to demonstrate the framing in each picture. The first one shows that the picture is in the frame which makes it clearer with more detail. With the other 2 pictures they only show half a face which doesn't show full facial expression.
Subscribe to:
Posts (Atom)